Thursday, April 29, 2010
Joined the twitter revolution!
I finally joined Twitter, @greenbabybooty, now we'll see if i can figure it out :)
Sunday, April 11, 2010
Rag Quilts - with instructions
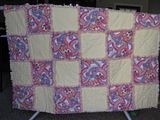
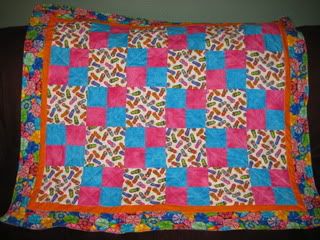
I recently made some new rag quilts to sell. I think they turned out very well and super cute.
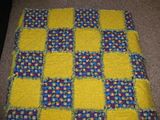

Rag quilts, in my opinion, are the easiest quilt to make without a quilting machine. It is hard to quilt a blanket with a regular sewing machine, trying to bunch everything up to get to the center. I figured I would add some instructions for those of you that would like to give it a try. I made quilts 40 x 48 inches, crib/toddler bed size. But you can make any size you want. I'll include the information below. I used 8 inch squares, but you can always figure out dimensions for smaller squares. The fabric measurements are for 45" wide fabrics, which i found most flannel is. I also used flannel back satin on other quilts, which is a wider bolt.
INSTRUCTIONS:
Remember, yards are per side, so if you are doing 2 fabrics for 1 side, divide by 2
Crib: 30 squares per side
2 1/4 yards per side
finished measurements 40" X 48"
Twin: 99 squares per side
7 yards per side
finished measurements 72" X 88"
Full: 20 squares per side
8 1/2 yards per side
finished measurements 80" X 96"
Queen: 143 squares per side
10 yards per side
finished measurements 88" X 104"
King: 196 squares per side
13 3/4 yards per side
finished measurements 112" X 112"
1. For an 8" block, cut the fabric 10" square and the batting 8" square. You will need two fabric squares and one batting square for each block.
2. Layer the batting inside two of the pieces of fabric with the wrong sides together. I usually lay my ruler along the top of the flannel to keep the batting centered.
3. Quilt by making an X across the block. I have a walking foot on my machine, which helps a little, but I also made one before I got the foot, and there wasn't too much difference. It will most likely pucker and shift a little, but don't worry it will all even out with cutting the edges and washing!
4. Connect your blocks by using a 1-inch seam allowance making sure all seams end up on one side. Sometimes I use 1/8 less than 1 inch markers on my machine, but don't go more than 1 inch. I use a pretty small stitch to reduce the chances of cutting a hole in the seam when clipping the edges.
5. Connect rows using 1-inch seam. Most machines have markers on the inside, little lines at 1/8 increments. Took me forever to figure out that is what they were for :) Make sure all seams match and seam allowance is all on one side, the front. Open the seams when you connect the rows.
6. When all your rows are together, sew 1 inch from the outer edge of the quilt all the way around to seal the edge. I also use satin quilt binding, which gives it a nice finished look, but cutting the edges is easier and quicker.
7. Clip your seams 1/8th to 1/4 inch apart, clipping odwn to seam but not through the stitch line. Also clip edge all the way around the quilt. I also use satin quilt binding to edge the quilt, which gives it a nice finished look, but cutting the edges is easier and quicker.
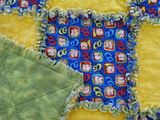
8. Now it is ready to be washed and will get "raggy." After it's done in the waher, take it outside and
shake it, then put it in the dryer. Be sure to clean your lint trap frequently during the drying. Lots of little frays and pieces end up in there, more or less depending on the fabric you choose. After the dryer I take a lint brush to it to get all the little pieces off.
This is best made with a fabric that frays. I have seen denim also. I usually use flannel or flannel back satin. I have also seen some with regular quilters cotton that frays quite well. have fun and mix and match fabrics and colors!


Rag quilts, in my opinion, are the easiest quilt to make without a quilting machine. It is hard to quilt a blanket with a regular sewing machine, trying to bunch everything up to get to the center. I figured I would add some instructions for those of you that would like to give it a try. I made quilts 40 x 48 inches, crib/toddler bed size. But you can make any size you want. I'll include the information below. I used 8 inch squares, but you can always figure out dimensions for smaller squares. The fabric measurements are for 45" wide fabrics, which i found most flannel is. I also used flannel back satin on other quilts, which is a wider bolt.
INSTRUCTIONS:
Remember, yards are per side, so if you are doing 2 fabrics for 1 side, divide by 2
Crib: 30 squares per side
2 1/4 yards per side
finished measurements 40" X 48"
Twin: 99 squares per side
7 yards per side
finished measurements 72" X 88"
Full: 20 squares per side
8 1/2 yards per side
finished measurements 80" X 96"
Queen: 143 squares per side
10 yards per side
finished measurements 88" X 104"
King: 196 squares per side
13 3/4 yards per side
finished measurements 112" X 112"
1. For an 8" block, cut the fabric 10" square and the batting 8" square. You will need two fabric squares and one batting square for each block.
2. Layer the batting inside two of the pieces of fabric with the wrong sides together. I usually lay my ruler along the top of the flannel to keep the batting centered.
3. Quilt by making an X across the block. I have a walking foot on my machine, which helps a little, but I also made one before I got the foot, and there wasn't too much difference. It will most likely pucker and shift a little, but don't worry it will all even out with cutting the edges and washing!
4. Connect your blocks by using a 1-inch seam allowance making sure all seams end up on one side. Sometimes I use 1/8 less than 1 inch markers on my machine, but don't go more than 1 inch. I use a pretty small stitch to reduce the chances of cutting a hole in the seam when clipping the edges.
5. Connect rows using 1-inch seam. Most machines have markers on the inside, little lines at 1/8 increments. Took me forever to figure out that is what they were for :) Make sure all seams match and seam allowance is all on one side, the front. Open the seams when you connect the rows.
6. When all your rows are together, sew 1 inch from the outer edge of the quilt all the way around to seal the edge. I also use satin quilt binding, which gives it a nice finished look, but cutting the edges is easier and quicker.
7. Clip your seams 1/8th to 1/4 inch apart, clipping odwn to seam but not through the stitch line. Also clip edge all the way around the quilt. I also use satin quilt binding to edge the quilt, which gives it a nice finished look, but cutting the edges is easier and quicker.
8. Now it is ready to be washed and will get "raggy." After it's done in the waher, take it outside and
shake it, then put it in the dryer. Be sure to clean your lint trap frequently during the drying. Lots of little frays and pieces end up in there, more or less depending on the fabric you choose. After the dryer I take a lint brush to it to get all the little pieces off.
This is best made with a fabric that frays. I have seen denim also. I usually use flannel or flannel back satin. I have also seen some with regular quilters cotton that frays quite well. have fun and mix and match fabrics and colors!
Missing again
Time to get back to the blogging. I have been doing quite a few projects and forgetting to post them here, so will get back to it. I have some things in the wash, so watch for some new rag quilts!
I have also recently come across a cloth diapering website that I LOVE! Check out http://www.momsmilkboutique.com/. You can also follow them on facebook to find out about awesome deals coming up and some free BG AIO coupons at random times. While it is my favorite for cloth diapering needs, they also carry great baby carriers and wraps ( Ergo, Beco, Moby) and best of all, FREE SHIPPING! Cant pass up free shipping sites.
I have also recently come across a cloth diapering website that I LOVE! Check out http://www.momsmilkboutique.com/. You can also follow them on facebook to find out about awesome deals coming up and some free BG AIO coupons at random times. While it is my favorite for cloth diapering needs, they also carry great baby carriers and wraps ( Ergo, Beco, Moby) and best of all, FREE SHIPPING! Cant pass up free shipping sites.
Tuesday, February 16, 2010
Hiatus
It's been a while since I've been on here. I didnt realize how long. The holidays were so busy and then my son's 1st birthday (AH he's 1 already!!). Not many new projects or diaper related things either. I fell off the cloth diaper wagon but jumping back on this week! I do have a rag quilt almost finished that I will of course post some pictures of when it is all the way done. I thought it would be easier than a regular quilt, but not so much. I am also working on my own gDiaper pant that hopefully will work out.
Wednesday, December 23, 2009
Finished projects!
Well, it's the week of christmas, so things are busy, but wanted to share some finished projects. I finished the quilt I made for Quilt for Kids and I have a new found appreciation for quilters. While it was pretty simple to sew the squares together, the quilting was not so much fun after it was put together. I imagine it is fairly simple with an actual quilting machine, but with a sewing machine it takes a little maneuvering. Being my first quilt, I think I did a pretty good job.
I also made my son a pair of booties. He has fairly wide feet right now, so shoes never seem to fit. So nothing better than a custom pair. I based it off this pattern http://www.cedesign.com/familyphotos/sewing/info/fleecebooties/index.html but made some of my own alterations, and voila!
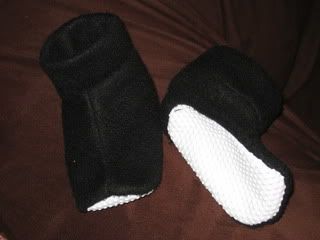
MERRY CHRISTMAS AND HAPPY HOLIDAYS TO EVERYONE!!!
Saturday, December 12, 2009
Make your own mittens!!
So, I decided to make custom mittens for my little guy, since I have sooo much fleece and store-bought mittens are always too big or too small. I will share my process with everyone, so you can make your own too!
First, I choose fleece since it has the most stretch and, like I said, I have a lot. I have seen them make out of wool sweaters also, with the wrist cuff of the sleeve as the wrist on the mitten, then you don't really need elastic. I picked a scrap piece of white I had to practice. You can mix and match and use different patterns to make it fun.
I started by tracing Cs hand (which is not easy to do on a 10 month old who does not want their hand held, but you just need the approximate size). Then I drew somewhat of a mitten shape on a piece of paper and made sure it was even (I only cut out 1/2 of the paper, then folded over and traced the edge).
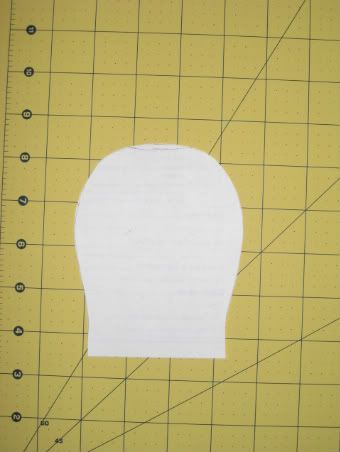
Then cut out 8 of the mitten shapes with the stretch from side to side.

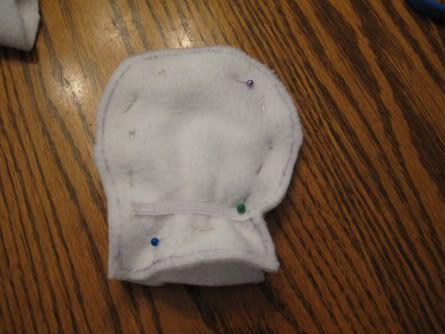
Then you will need to sew elastic onto the wrong side (if there is one) of your fabric on all 8 pieces. I didn' stretch all the way tight, just enough to make it a little stretchy, I didn't want them too tight on his chubby wrists :)
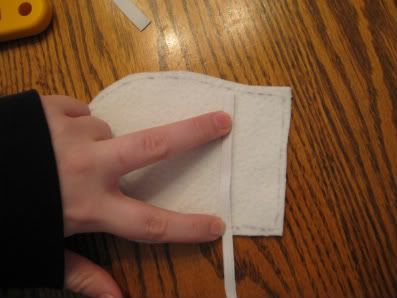
I used just a regular zig-zag stitch. I didn't go all the way to the edge of my seam, so I wouldnt have to sew in the ends, just makes it easier to sew for me.
Once you have the elastic sewn into all of the pieces. then you are going to want to sew 2 of the pieces together at a time. I have realized that I never leave enough seam on fleece, the bottom piece tends to pull in the grips a little, so next time I will leave a larger seam.
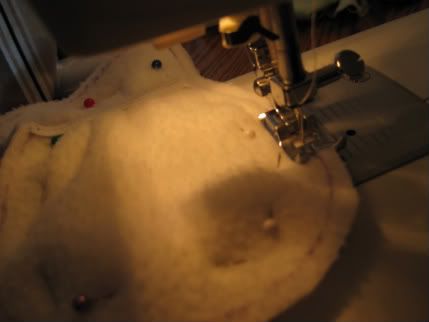
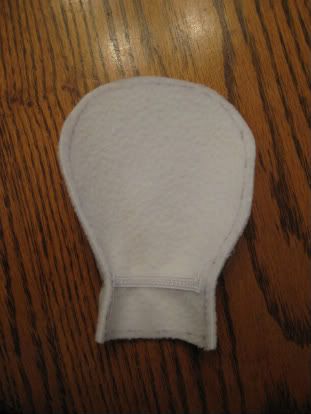
Then you will have 4 mittens sewn together. You will take 2 of the mitts and turn one the right side out and leave the other the wrong side out.
Then you stuff the wrong side out into the other one. I tend to always have one a little bigger, so I use that as the right side out, or whichever stitches look better if I do a colored.
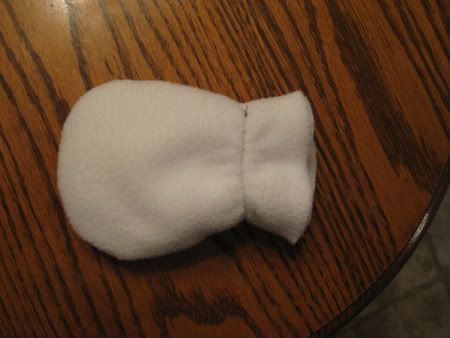
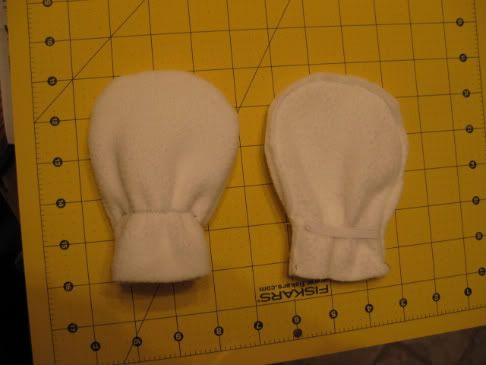
Then all you have to do is finish the bottom edge. I, of course, did not leave enough seam to turn and topstitch it, but since fleece doesn't fray I just zig-zagged to keep them together.
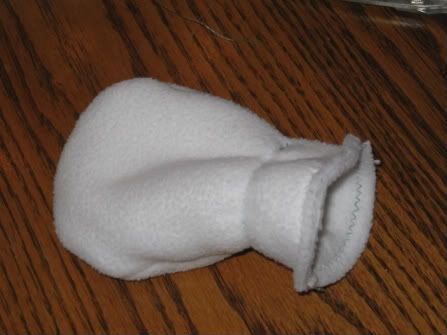
And the end project on my model, who was not a fan of things binding his hands while he wanted to play :)
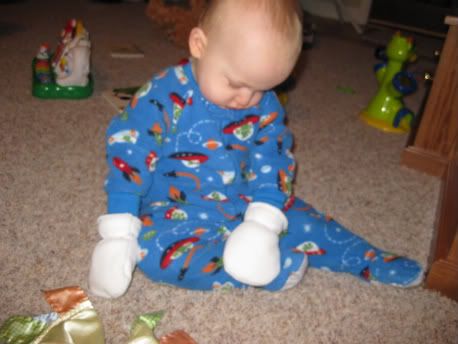
Easy as pie! I didn't add thumbs, since at this age, they don't really need them or cooperate to put them in the separate holes. I did also realize that I should have just left the edges straight instead of curving in at the wrists to make them a little looser. I love to be able to make my own since you can make custom sizes and colors and patterns and whatever else you choose!
First, I choose fleece since it has the most stretch and, like I said, I have a lot. I have seen them make out of wool sweaters also, with the wrist cuff of the sleeve as the wrist on the mitten, then you don't really need elastic. I picked a scrap piece of white I had to practice. You can mix and match and use different patterns to make it fun.
I started by tracing Cs hand (which is not easy to do on a 10 month old who does not want their hand held, but you just need the approximate size). Then I drew somewhat of a mitten shape on a piece of paper and made sure it was even (I only cut out 1/2 of the paper, then folded over and traced the edge).

Then cut out 8 of the mitten shapes with the stretch from side to side.

Then you will need to sew elastic onto the wrong side (if there is one) of your fabric on all 8 pieces. I didn' stretch all the way tight, just enough to make it a little stretchy, I didn't want them too tight on his chubby wrists :)

I used just a regular zig-zag stitch. I didn't go all the way to the edge of my seam, so I wouldnt have to sew in the ends, just makes it easier to sew for me.

Once you have the elastic sewn into all of the pieces. then you are going to want to sew 2 of the pieces together at a time. I have realized that I never leave enough seam on fleece, the bottom piece tends to pull in the grips a little, so next time I will leave a larger seam.


Then you will have 4 mittens sewn together. You will take 2 of the mitts and turn one the right side out and leave the other the wrong side out.

Then you stuff the wrong side out into the other one. I tend to always have one a little bigger, so I use that as the right side out, or whichever stitches look better if I do a colored.

Then all you have to do is finish the bottom edge. I, of course, did not leave enough seam to turn and topstitch it, but since fleece doesn't fray I just zig-zagged to keep them together.

And the end project on my model, who was not a fan of things binding his hands while he wanted to play :)

Easy as pie! I didn't add thumbs, since at this age, they don't really need them or cooperate to put them in the separate holes. I did also realize that I should have just left the edges straight instead of curving in at the wrists to make them a little looser. I love to be able to make my own since you can make custom sizes and colors and patterns and whatever else you choose!
Tuesday, December 8, 2009
Say thanks to our troops!
I was informed of this website from a friend on facebook. Please support all of our brave men and woman, moms and dads, children, brothers and sisters, and every other family member overseas. You can go to this website http://www.letssaythanks.com/Home1024.html and pick out a card to send to a troop away from home this holiday season. All it takes is a few seconds and it will mean worlds to whomever receives support and happy wishes.
Subscribe to:
Posts (Atom)

