Wednesday, December 23, 2009

Finished projects!

Well, it's the week of christmas, so things are busy, but wanted to share some finished projects. I finished the quilt I made for Quilt for Kids and I have a new found appreciation for quilters. While it was pretty simple to sew the squares together, the quilting was not so much fun after it was put together. I imagine it is fairly simple with an actual quilting machine, but with a sewing machine it takes a little maneuvering. Being my first quilt, I think I did a pretty good job.

Photobucket

I also made my son a pair of booties. He has fairly wide feet right now, so shoes never seem to fit. So nothing better than a custom pair. I based it off this pattern http://www.cedesign.com/familyphotos/sewing/info/fleecebooties/index.html but made some of my own alterations, and voila!

Photobucket

MERRY CHRISTMAS AND HAPPY HOLIDAYS TO EVERYONE!!!

Saturday, December 12, 2009

Make your own mittens!!

So, I decided to make custom mittens for my little guy, since I have sooo much fleece and store-bought mittens are always too big or too small. I will share my process with everyone, so you can make your own too!

First, I choose fleece since it has the most stretch and, like I said, I have a lot. I have seen them make out of wool sweaters also, with the wrist cuff of the sleeve as the wrist on the mitten, then you don't really need elastic. I picked a scrap piece of white I had to practice. You can mix and match and use different patterns to make it fun.

I started by tracing Cs hand (which is not easy to do on a 10 month old who does not want their hand held, but you just need the approximate size). Then I drew somewhat of a mitten shape on a piece of paper and made sure it was even (I only cut out 1/2 of the paper, then folded over and traced the edge).
Photobucket

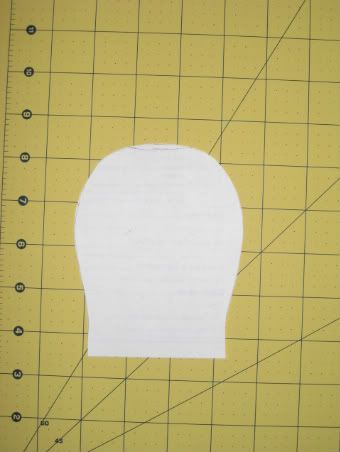
Then cut out 8 of the mitten shapes with the stretch from side to side.
Photobucket

Then you will need to sew elastic onto the wrong side (if there is one) of your fabric on all 8 pieces. I didn' stretch all the way tight, just enough to make it a little stretchy, I didn't want them too tight on his chubby wrists :)
Photobucket

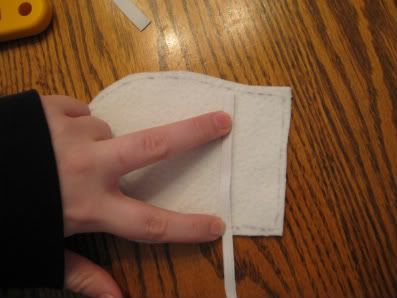
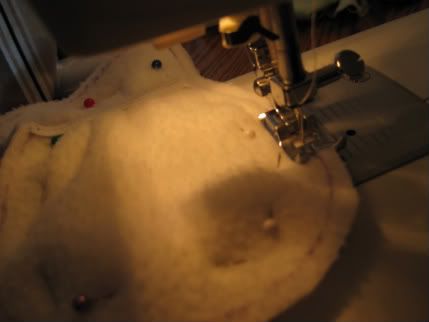
I used just a regular zig-zag stitch. I didn't go all the way to the edge of my seam, so I wouldnt have to sew in the ends, just makes it easier to sew for me.
Photobucket

Once you have the elastic sewn into all of the pieces. then you are going to want to sew 2 of the pieces together at a time. I have realized that I never leave enough seam on fleece, the bottom piece tends to pull in the grips a little, so next time I will leave a larger seam.
Photobucket
Photobucket

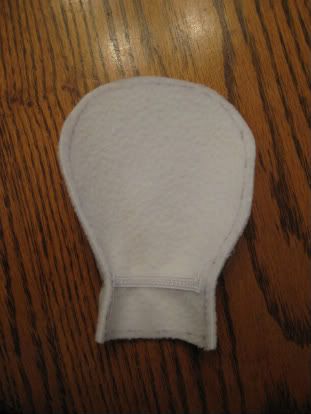
Then you will have 4 mittens sewn together. You will take 2 of the mitts and turn one the right side out and leave the other the wrong side out.
Photobucket

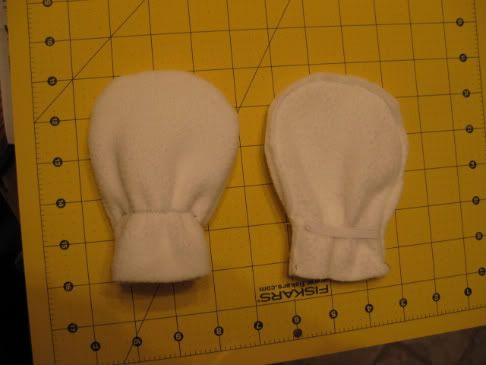
Then you stuff the wrong side out into the other one. I tend to always have one a little bigger, so I use that as the right side out, or whichever stitches look better if I do a colored.
Photobucket

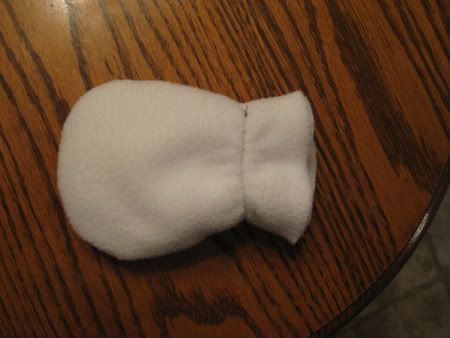
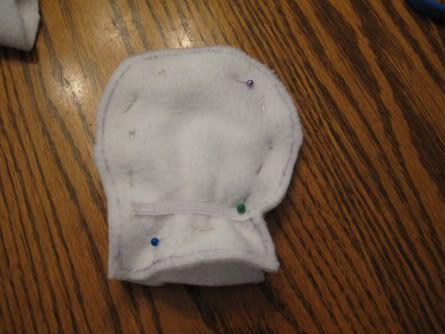
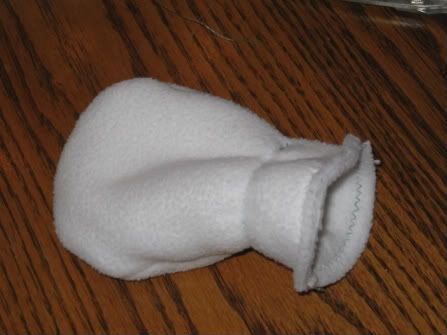
Then all you have to do is finish the bottom edge. I, of course, did not leave enough seam to turn and topstitch it, but since fleece doesn't fray I just zig-zagged to keep them together.
Photobucket

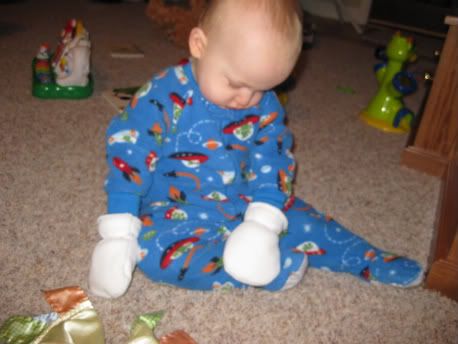
And the end project on my model, who was not a fan of things binding his hands while he wanted to play :)
Photobucket

Easy as pie! I didn't add thumbs, since at this age, they don't really need them or cooperate to put them in the separate holes. I did also realize that I should have just left the edges straight instead of curving in at the wrists to make them a little looser. I love to be able to make my own since you can make custom sizes and colors and patterns and whatever else you choose!

Tuesday, December 8, 2009

Say thanks to our troops!

I was informed of this website from a friend on facebook. Please support all of our brave men and woman, moms and dads, children, brothers and sisters, and every other family member overseas. You can go to this website http://www.letssaythanks.com/Home1024.html and pick out a card to send to a troop away from home this holiday season. All it takes is a few seconds and it will mean worlds to whomever receives support and happy wishes.

Thursday, December 3, 2009

Quilts for kids!!

I got my fabric today to make a quilt for Quilt for Kids and I am so excited!! I have never quilted, so it will definitely be a learning experience. It is a wonderful cause, so happy to donate my time. My BFF and I are going to start this weekend, so I am sure I will have more to share.

For more information on this awesome challenge, visit http://www.downy.com/en-US/helping-kids.jspx. They send you the fabric to make a quilt for a child in the hospital and all you have to do is create the memory and send it back. I hope more people get into this. You can also make your own quilt and send it to them. Measurements and more information is on the website. Happy Quilting!!!!

Wednesday, December 2, 2009

Easy Peasy Baby Legs

Ever found cute socks that you wish your little one could wear? Here is the solution, make your own baby legs (leg warmers)!!! It is very inexpensive, you can get a 3 pack of socks for $7 and get 3 pairs of legs. You are going to want to get some knee high, or thigh high for older/longer kids, socks that have some stretch.

Photobucket
Then, like the above picture shows. you will cut out the heel and the toe of the sock. We will only be using the leg part and foot part, shown below.
Photobucket
Then you will take the foot part of the sock that you cut out and fold it in half, so that the raw edges meet.
Photobucket
Then you will slid the long leg part into the folded in half foot section, with all raw edges meeting.
Photobucket
Photobucket

I took a piece of red fleece to use as my cuff, to make it more festive for Christmas. I did the same as the regular foot section and folded it in the leg section to sew together.
Photobucket

Photobucket

Photobucket

Photobucket

Then with all layers sewn together, it looks like above. then just fold the shorter section back over, and voila, super cute, custom baby legs.

Photobucket
Photobucket
I like the cuffs at the bottom, but your child could wear them either way.