First, I choose fleece since it has the most stretch and, like I said, I have a lot. I have seen them make out of wool sweaters also, with the wrist cuff of the sleeve as the wrist on the mitten, then you don't really need elastic. I picked a scrap piece of white I had to practice. You can mix and match and use different patterns to make it fun.
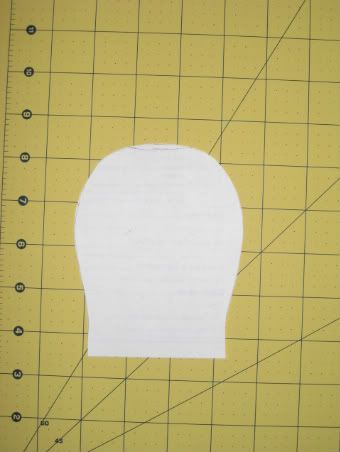
I started by tracing Cs hand (which is not easy to do on a 10 month old who does not want their hand held, but you just need the approximate size). Then I drew somewhat of a mitten shape on a piece of paper and made sure it was even (I only cut out 1/2 of the paper, then folded over and traced the edge).

Then cut out 8 of the mitten shapes with the stretch from side to side.

Then you will need to sew elastic onto the wrong side (if there is one) of your fabric on all 8 pieces. I didn' stretch all the way tight, just enough to make it a little stretchy, I didn't want them too tight on his chubby wrists :)

I used just a regular zig-zag stitch. I didn't go all the way to the edge of my seam, so I wouldnt have to sew in the ends, just makes it easier to sew for me.

Once you have the elastic sewn into all of the pieces. then you are going to want to sew 2 of the pieces together at a time. I have realized that I never leave enough seam on fleece, the bottom piece tends to pull in the grips a little, so next time I will leave a larger seam.


Then you will have 4 mittens sewn together. You will take 2 of the mitts and turn one the right side out and leave the other the wrong side out.

Then you stuff the wrong side out into the other one. I tend to always have one a little bigger, so I use that as the right side out, or whichever stitches look better if I do a colored.

Then all you have to do is finish the bottom edge. I, of course, did not leave enough seam to turn and topstitch it, but since fleece doesn't fray I just zig-zagged to keep them together.

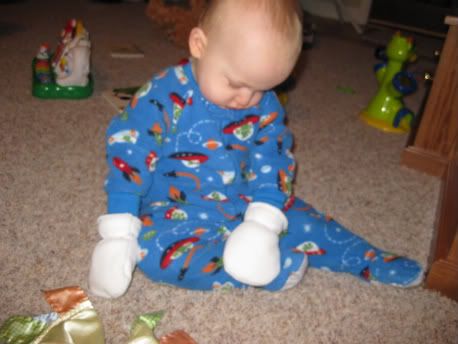
And the end project on my model, who was not a fan of things binding his hands while he wanted to play :)

Easy as pie! I didn't add thumbs, since at this age, they don't really need them or cooperate to put them in the separate holes. I did also realize that I should have just left the edges straight instead of curving in at the wrists to make them a little looser. I love to be able to make my own since you can make custom sizes and colors and patterns and whatever else you choose!


No comments:
Post a Comment